 |
| As you can see I used multiple diagrames to create my final glider. I think that without the cardboard it would have been lighter allowing for a longer flight . Mine only flew 18 feet of of the balcony of a 2 story building. Even thought I failed, I had a ton of fun making, flying and finally destroying the glider. By Julian B 7B |
Showing posts with label cardboard. Show all posts
Showing posts with label cardboard. Show all posts
Sunday, June 4, 2017
7B-10 Foam Glider Fails for Life
For the BPC school maker faire, I Julian B plunged in to the challenge of flying a glider. I knew it would be hard but I tried and failed. My foam glider's wing span was 50 inches wide and 12 inches long. I chose this project because I had previously watched a few really cool gliders fly super far. (They only put the ones that work online:). I was tempted to make my own fly as fare as their's. It didn't go so well for me. I used lots of tape, foam, card board and time. I also used 2 blades on an exacto knife and a tape-measure to make my fail of a foam glider.

7A-4 Cardboard Tank
For Maker Faire we built a cardboard and wood tank. We wanted to build this because we have been building with cardboard and all year and we decided we wanted to build a giant creation.

One way we went through the design process was that we at first wanted to build the entire tank out of wood, but then we realized that would be too expensive. So we decided that we were going to build it with a wooden skeleton but we found that was also too expensive. So we decided on the idea we used which was to have a wooden base and have a cardboard and PVC frame. One challenge we had was putting on the casters because we realized the bolts we had were too small so we had to find longer bolts which we found, but then when we put them through the wood and put on the casters, we realized the casters would hit the bolts. To solve the problem we put nuts on top of the wood and then the casters did not hit the bolts anymore. One thing we learned was that zip ties hold cardboard together a lot better than screws and nails do.
One way we went through the design process was that we at first wanted to build the entire tank out of wood, but then we realized that would be too expensive. So we decided that we were going to build it with a wooden skeleton but we found that was also too expensive. So we decided on the idea we used which was to have a wooden base and have a cardboard and PVC frame. One challenge we had was putting on the casters because we realized the bolts we had were too small so we had to find longer bolts which we found, but then when we put them through the wood and put on the casters, we realized the casters would hit the bolts. To solve the problem we put nuts on top of the wood and then the casters did not hit the bolts anymore. One thing we learned was that zip ties hold cardboard together a lot better than screws and nails do.
Next time if we built it again we would make it look nicer and maybe decorate the inside. We would also have liked to find a better way to propel it and put some sort of turret or catapult on the top. Some advice we have is to put the casters on the bottom before you put on the cardboard and PVC frame. Another piece of advice is to get large pieces of cardboard that are large enough to cover an entire side because it will be a lot easier to put the tank together and will require a lot less zip ties.
The total cost of building the tank is a decent sum. It is 11.76 for 4 8ft 2 by 4s. It is 15$ for a 4’ by 8’ by 7/16’’ piece of plywood. It is 13.7 for 8 plate swivel casters although 6 will work. It is 9.94$ for 650 zip ties, you don’t need that many but it can be nice to have a lot of extras. It is 13.89 for the 3, 1 inch by 10 ft PVC pipes. The bolts for the casters will vary in cost because you need the bolts to fit the holes on your plated casters and go through the wood, the cost will probably around 15$ depending on the bolts and casters. The cardboard you can get for free some tips on where you can get it is on this website. You also need a drill, box cutter, a saw, and some screws. The total is probably going to be about 80$. This is a link to some other ways to make a cheaper cardboard creation.
-By Nik and Gabe
7C-8-Cardboard Bungalow
Our Maker faire project was to make a functional cardboard bungalow. My group was very excited to get started on this project because we had always wanted to make a bungalow, which is basically cooler version of a fort. When we started off on this project the first problem we ran into was that getting precise measurements of the cardboard so we could put it together perfectly was very challenging.
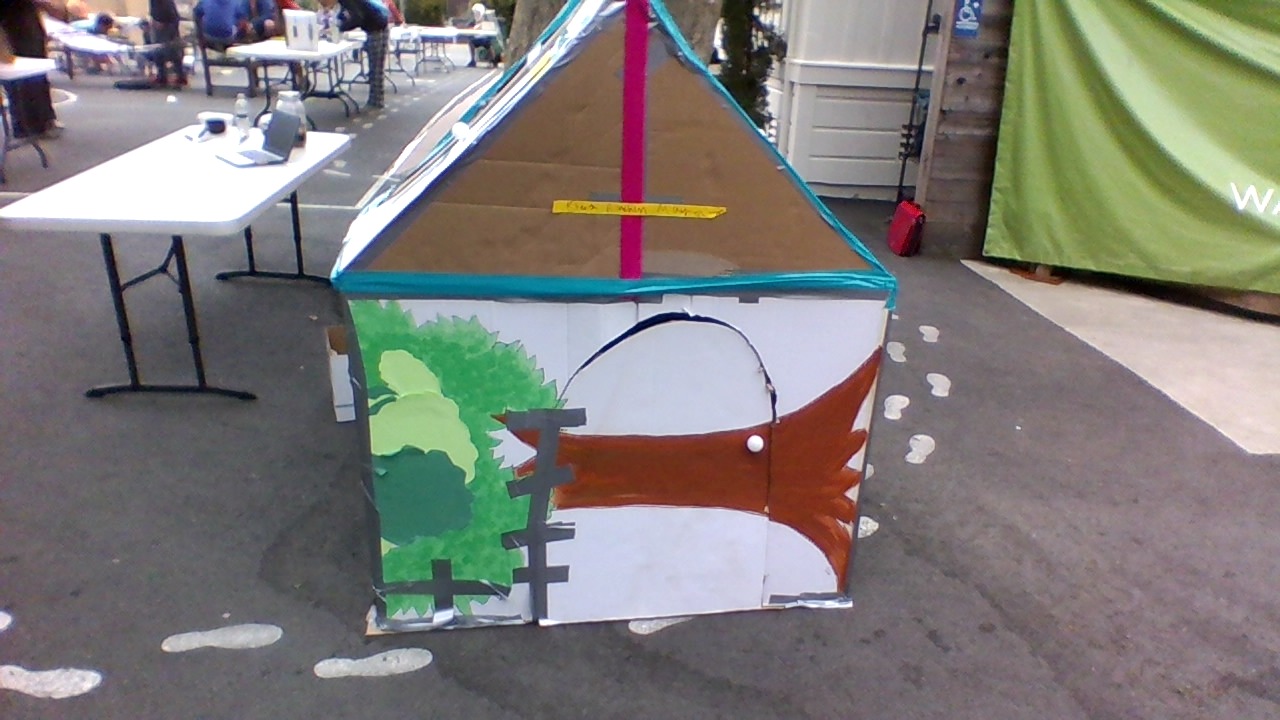
We decided to make a cardboard bungalow after an extended period of time set for brainstorming. The Bungalow is a 5 sided shape with a 7 paneled roof made from cardboard and sealed by duct tape, containing 3 windows and 1 door. Other materials used include 2 foam insulation panels, many felt pillows, hot glue sealing, scotch tape, 4 ping pong balls, half of a soda can and multicolored LED lights (powered by 2 AA batteries). My group member Kiera and I (Rinchen) were inspired to create such a project by the fact that we felt the need to sleep on her balcony. Although, we weren’t permitted to do so due to the fact that our guardians were unconvinced from the fact that we wouldn’t be exposed to things such as birds, insects, hypothermia, and discomfort. We succeeded in disproving all such things with our bungalow. Although, during the process of completing said tasks, we were faced with many difficulties. Our greatest issue was our roof not fitting together, due to the shape the Bungalow. We overcame this problem, after many trials and errors of shapes of different roof panels; eventually coming to a fitting conclusion with our roof. When we informed our third group member (Maya), of this idea she contently agreed. The most problematic step to our project will be getting it up 3 flights of stairs and onto a balcony; considerably our most feared step to the process.
In the process of making our bungalow we not only learned how to work as a team, but enjoyed the fact that we became so insync not only as a team but with our friendships. Through many issues that we were faced with with our project we tested and our patience grew. Advice to others thinking about pursuing such a project, include having patience, testing different models to see which is best fit, and using trial and error not as a last resort but rather a tactic. If we were to have done something differently in this process it would have been to, come up with exact measurements and shapes beforehand, to simplify the project.
Some sites we used as references during the bungalow building process include: How to make a cardboard bungalow, amazon. The estimated total cost is about 19 dollars, we were able to achieve this low cost by reusing most materials besides duct tape, fairy lights, hot glue, and stuffing.
Subscribe to:
Posts (Atom)